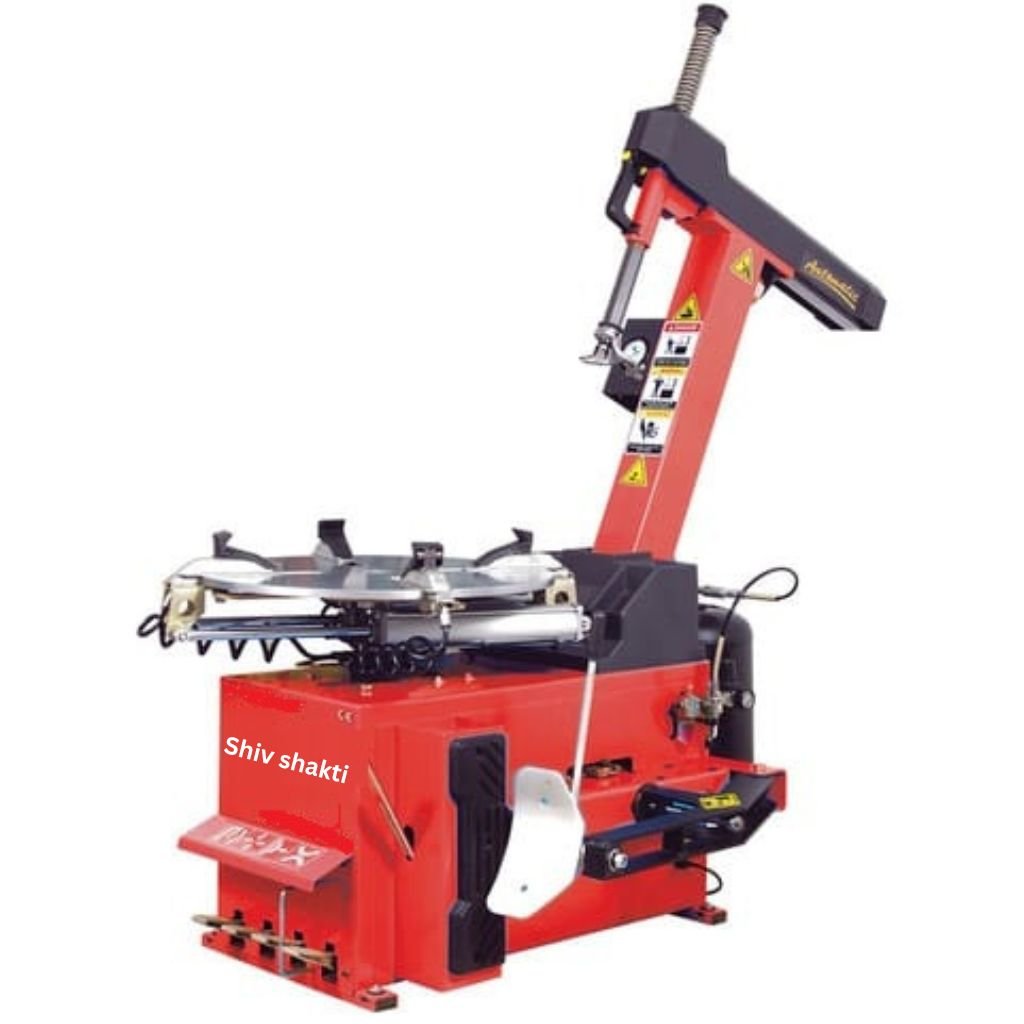
Best Tyre Changer Installation Guide 2026: 21 Expert Steps for Safe & Professional Setup
Introduction
A tyre changer machine is one of the most essential pieces of equipment in any tyre shop, automobile workshop, or vehicle service centre. It allows technicians to remove and install tyres quickly, safely, and accurately while protecting expensive alloy wheels from damage. However, even the best tyre changer cannot perform efficiently without proper installation. This is why Tyre Changer Installation is a critical step in ensuring long-term performance, operator safety, and maximum productivity.
A correctly completed Tyre Changer Installation ensures that the machine operates smoothly, maintains accurate clamping force, and minimizes vibration during operation. On the other hand, poor installation can lead to machine instability, excessive wear, frequent breakdowns, inaccurate operation, and safety risks for technicians.
Whether you are setting up a new tyre shop, expanding your existing garage, or replacing an old machine, following a professional Tyre Changer Installation process will help you get the best return on your investment.
In this comprehensive Tyre Changer Installation guide, you’ll learn everything from site preparation and machine positioning to electrical connections, air supply requirements, safety precautions, and professional installation tips. https://shivshaktigarage.com/tyre-changer-machine-manufacturer-in-india/
What is Tyre Changer Installation?
Tyre Changer Installation is the process of properly assembling, positioning, connecting, testing, and calibrating a tyre changer machine before it is put into regular operation.
A professional installation involves:
- Selecting the correct installation location
- Preparing the workshop floor
- Positioning the machine correctly
- Securing the machine to the floor
- Connecting the compressed air system
- Connecting the electrical supply
- Testing all machine functions
- Calibrating moving components
- Verifying safety features
Proper Tyre Changer Installation ensures that the machine operates efficiently while protecting both technicians and customer vehicles. https://g.page/r/CXBa8k4gljxAEBM/review
Why Proper Tyre Changer Installation Matters
Many workshop owners invest in high-quality equipment but overlook the importance of installation. Incorrect installation can reduce machine life and increase maintenance costs. https://www.indiamart.com/shivshaktigarageequipments/profile.html?srsltid=AfmBOoqD0PV5wD6hWOvnmd8t–Ulq3yHYx6DQW-r0eqJH6e3fk6HrBLT
Improves Machine Stability
A securely installed tyre changer remains stable during heavy-duty operation, reducing vibration and improving precision.
Enhances Operator Safety
Professional Tyre Changer Installation minimizes risks caused by unstable equipment, loose electrical connections, or improper air supply.
Extends Machine Life
Correct installation reduces unnecessary stress on bearings, pneumatic components, and the machine frame, helping extend service life.
Improves Productivity
A properly installed machine operates smoothly, allowing technicians to complete tyre replacement jobs more efficiently.
Protects Alloy Wheels
Correct alignment of the mounting head and clamping system reduces the risk of damaging expensive alloy wheels.
Benefits of Professional Tyre Changer Installation
Choosing professional installation offers several long-term advantages. https://shivshaktigarage.com/best-tyre-changer-in-india/
Reliable Performance
Correct setup ensures every machine function operates as intended from the first day.
Lower Maintenance Costs
Professional installation helps prevent issues caused by misalignment, loose fasteners, or incorrect air pressure.
Faster Workshop Operations
Properly installed equipment allows technicians to work efficiently, increasing daily service capacity.
Better Customer Satisfaction
Smooth machine operation leads to faster service and improved protection for customer wheels, enhancing trust and repeat business.
Workshop Requirements Before Tyre Changer Installation
Before beginning the Tyre Changer Installation, evaluate your workshop to ensure it meets the machine’s operating requirements.
Adequate Floor Space
Allow sufficient clearance around the machine so technicians can safely operate it from all sides.
Recommended considerations:
- Easy wheel handling
- Comfortable technician movement
- Space for accessories
- Future maintenance access https://shivshaktigarage.com/tyre-shop-setup-cost/
Strong Concrete Floor
A tyre changer should be installed on a solid, level concrete floor capable of supporting the machine’s weight and resisting vibration.
Avoid:
- Uneven flooring
- Weak concrete
- Wooden platforms
- Slippery surfaces
Proper Electrical Supply
Most tyre changers require a stable electrical connection.
Before installation, verify: https://shivshaktigarage.com/complete-garage-equipment-package/
- Correct voltage
- Proper grounding
- Suitable circuit protection
- Reliable power supply
Electrical work should always comply with local safety standards.
Compressed Air Supply
Most tyre changer machines operate using compressed air.
Ensure your workshop has: https://shivshaktigarage.com/new-garage-setup-guide/
- Adequate air pressure
- Sufficient airflow
- Moisture-free compressed air
- Proper air filtration
A high-quality air compressor contributes to consistent machine performance.
Tools Required for Tyre Changer Installation
Preparing the necessary tools before starting the installation saves time and ensures a smooth setup process.
Basic Installation Tools
Typical tools include:
- Socket wrench set
- Spanner set
- Screwdrivers
- Adjustable wrench
- Spirit level
- Measuring tape
- Hammer drill
- Concrete anchor bolts
- Torque wrench
- Safety gloves
- Safety glasses
Using the correct tools improves installation accuracy and safety. https://www.facebook.com/profile.php?id=61579407685280
Choosing the Best Installation Location
Selecting the right location is one of the most important steps in Tyre Changer Installation.
Easy Vehicle Access
Position the machine where vehicles can be moved in and out without disrupting workshop operations.
Good Lighting
Proper lighting improves technician visibility and helps reduce installation and operating errors.
Ventilation
Maintain good airflow within the workshop to create a comfortable working environment and protect equipment from excessive heat and moisture.
Accessibility
Leave enough space around the machine for routine maintenance, cleaning, and future servicing.
Safety Precautions Before Installation
Safety should always be the highest priority during Tyre Changer Installation.
Read the Installation Manual
Carefully review the manufacturer’s instructions before assembling or connecting the machine.
Wear Personal Protective Equipment (PPE)
Recommended PPE includes:
- Safety glasses
- Protective gloves
- Steel-toe safety shoes
- Hearing protection when drilling concrete
Disconnect Power During Setup
Never connect electrical power until the machine has been fully assembled and inspected.
Verify Air Supply
Ensure the compressed air system is switched off before connecting hoses and fittings.
Check Machine Components
Before installation, inspect the machine for:
- Shipping damage
- Missing parts
- Loose hardware
- Damaged hoses
- Bent components
Report any issues before proceeding with installation.
Preparing the Installation Area
Proper preparation improves installation quality and helps prevent future operational issues.
Clean the Floor
Remove:
- Dust
- Oil
- Grease
- Loose debris
- Construction materials
A clean floor allows accurate positioning and secure anchoring.
Mark the Installation Position
Use the machine base as a template to mark anchor bolt locations accurately.
Double-check measurements before drilling.
Check Floor Level
Use a spirit level to confirm the installation surface is perfectly level.
Uneven flooring may affect machine stability and operational accuracy.
Common Mistakes Before Installation
Avoid these mistakes to ensure a successful Tyre Changer Installation.
Mistake 1
Installing the machine on an uneven floor.
Mistake 2
Using an undersized air compressor.
Mistake 3
Ignoring the manufacturer’s installation instructions.
Mistake 4
Failing to provide adequate working space.
Mistake 5
Using incorrect anchor bolts.
Mistake 6
Connecting the machine to an unstable electrical supply.
Avoiding these mistakes helps improve equipment performance and reduces future maintenance costs.
Expert Preparation Tips
Professional installers recommend the following before beginning Tyre Changer Installation:
- Measure the available workspace carefully.
- Verify electrical and pneumatic requirements.
- Use high-quality anchor bolts.
- Confirm the floor can support the machine.
- Inspect all components before assembly.
- Prepare all required tools in advance.
- Ensure technicians understand the installation procedure. https://www.justdial.com/Delhi/Shiv-Shakti-Garage-Equipments-Vishnu-Garden/011PXX11-XX11-250718154737-U9U2_BZDET
Following these recommendations creates a solid foundation for safe, reliable, and efficient machine operation.
Step-by-Step Tyre Changer Installation Process
Once your workshop is prepared and all necessary tools are ready, you can begin the Tyre Changer Installation process. Following each step carefully ensures the machine operates safely and delivers reliable performance for years.
Step 1 – Unpack and Inspect the Machine
Before assembling the machine, carefully remove the packaging and inspect every component.
Check for:
- Shipping damage
- Missing accessories
- Loose fasteners
- Damaged air hoses
- Bent mounting arm
- Cracked plastic protectors
Verify that all parts listed in the user manual are included before starting the Tyre Changer Installation.
Step 2 – Position the Machine
Move the tyre changer to the selected installation area.
While positioning the machine: https://www.tradeindia.com/shiv-shakti-garage-equipments-163756341/
- Leave enough working space around all sides.
- Ensure technicians can easily operate the pedals.
- Maintain adequate clearance for large wheels.
- Keep the machine away from water or excessive moisture.
Correct positioning is essential for efficient Tyre Changer Installation.
Step 3 – Level the Machine
Use a precision spirit level to check the machine.
If the floor is uneven:
- Adjust leveling pads (if available).
- Use approved shims.
- Confirm the machine remains stable.
Proper leveling prevents vibration during operation. https://shivshaktigarage.com/best-garage-equipment-brand/
Step 4 – Mark Anchor Bolt Positions
Use the machine base as a drilling template.
Before drilling:
- Double-check measurements.
- Confirm technician access.
- Ensure adequate clearance for maintenance.
Accurate marking improves installation accuracy.
Step 5 – Drill the Floor
Using a heavy-duty hammer drill:
- Drill holes according to the recommended diameter.
- Remove concrete dust.
- Check hole depth.
- Verify anchor bolt alignment.
Always wear eye protection while drilling.
Step 6 – Secure the Machine
Install heavy-duty anchor bolts and tighten them evenly. https://shivshaktigarage.com/tyre-changer-buying-guide/
Avoid:
- Over-tightening
- Loose mounting
- Uneven tightening sequence
A securely mounted machine improves stability and extends equipment life. https://shivshaktigarage.com/garage-equipment-maintenance/
Connecting the Air Supply
Compressed air powers several important functions during Tyre Changer Installation.
Air Compressor Requirements
Choose an air compressor that provides:
- Stable operating pressure
- Sufficient airflow
- Moisture-free compressed air
- Reliable performance
Using an undersized compressor can reduce machine efficiency.
Install the FRL Unit
The Filter-Regulator-Lubricator (FRL) unit helps protect pneumatic components.
It should:
- Remove moisture
- Filter contaminants
- Regulate air pressure
- Supply lubrication
Proper air preparation extends machine life. https://shivshaktigarage.com/tyre-changer-price/
Connect the Air Hose
Connect the compressed air line securely.
After connection:
- Check for leaks.
- Verify pressure.
- Tighten fittings if necessary.
Use only high-quality pneumatic hoses.
Electrical Connection
Electrical work is a critical part of Tyre Changer Installation and should always be completed according to local electrical regulations.
Verify Voltage
Before connecting power, confirm that the machine voltage matches the workshop power supply.
Incorrect voltage may damage the motor and electrical components.
Ensure Proper Grounding
Grounding protects both operators and equipment.
Check:
- Ground wire connection
- Electrical panel grounding
- Earth resistance (if required)
Install Circuit Protection
Protect the machine using appropriate:
- Circuit breakers
- Fuses
- Surge protection
Electrical protection reduces the risk of equipment damage. https://shivshaktigarage.com/garage-machinery-supplier/
Machine Assembly
Some tyre changers require partial assembly after delivery.
Common assembly tasks include:
- Installing the mounting arm
- Fitting the bead breaker
- Installing the inflation gauge
- Connecting pneumatic lines
- Installing wheel protectors
- Securing pedal assemblies
Always follow the manufacturer’s instructions during assembly.
Machine Calibration
Calibration ensures accurate operation after Tyre Changer Installation.
Mounting Head Adjustment
The mounting head should maintain the recommended clearance from the wheel rim.
Improper adjustment may scratch alloy wheels. https://shivshaktigarage.com/rft-tyre-changer/
Clamp Alignment
Check that all clamps:
- Move evenly
- Hold wheels securely
- Release smoothly
- Operate without excessive force
Bead Breaker Alignment
Inspect the bead breaker for: https://www.youtube.com/@Shivshaktigarage
- Correct travel
- Smooth movement
- Proper contact angle
- Consistent pressure
Initial Testing Procedure
Never begin servicing customer vehicles until the machine has been fully tested.
Test Turntable Rotation
Operate the turntable without a wheel installed.
Check for: https://shivshaktigarage.com/semi-automatic-tyre-changer/
- Smooth rotation
- Unusual vibration
- Abnormal noise
- Consistent speed
Test Pneumatic Functions
Operate:
- Wheel clamps
- Bead breaker
- Inflation system
- Mounting arm
Confirm all pneumatic functions respond correctly. https://shivshaktigarage.com/garage-equipment-maintenance/
Perform a Trial Tyre Change
Use a spare wheel for testing.
Verify:
- Smooth tyre removal
- Easy tyre installation
- Proper clamping
- Accurate mounting head position
Successful testing confirms the Tyre Changer Installation has been completed correctly.
Common Tyre Changer Installation Mistakes
Even experienced workshops can make installation errors.
Mistake 1
Incorrect machine leveling.
Mistake 2
Poor electrical grounding.
Mistake 3
Insufficient air pressure.
Mistake 4
Improper mounting head adjustment.
Mistake 5
Using weak anchor bolts.
Mistake 6
Ignoring the manufacturer’s installation manual.
Mistake 7
Skipping the testing procedure.
Avoiding these mistakes improves machine performance and reduces future repair costs.
Troubleshooting After Installation
Some minor issues may appear during the first few hours of operation.
Machine Vibrates
Possible causes:
- Uneven floor
- Loose anchor bolts
- Incorrect leveling
Solution:
Recheck machine alignment and tighten anchor bolts.
Weak Clamping Force
Possible causes:
- Low air pressure
- Air leak
- Regulator setting
Solution:
Inspect the pneumatic system and adjust the air regulator. https://shivshaktigarage.com/tyre-changer-maintenance/
Turntable Does Not Rotate
Possible causes:
- Electrical connection problem
- Motor issue
- Belt adjustment
Solution:
Verify the electrical supply and inspect the drive system.
Bead Breaker Works Slowly
Possible causes:
- Moisture in air lines
- Low compressor capacity
- Air leakage
Solution:
Drain moisture, repair leaks, and ensure the compressor meets the required specifications. https://shivshaktigarage.com/automatic-tyre-changer/
Expert Installation Tips
Professional installers recommend the following to achieve the best results:
- Read the installation manual completely before starting.
- Use certified electricians for electrical connections.
- Install the machine on a reinforced concrete floor.
- Use genuine installation hardware.
- Test every machine function before customer use.
- Keep a record of installation settings and calibration.
- Train technicians on proper machine operation.
Following these expert recommendations ensures your Tyre Changer Installation is safe, reliable, and ready for daily workshop use.
Post-Installation Maintenance Checklist
Completing a successful Tyre Changer Installation is only the first step. Regular maintenance ensures that your machine continues to perform efficiently, minimizes downtime, and extends its service life. A well-maintained tyre changer provides consistent performance and reduces repair costs.
Daily Inspection Checklist
Perform these checks before starting work each day:
- Clean dust, grease, and rubber particles from the machine.
- Check air pressure and air hose connections.
- Inspect the mounting head for wear.
- Test the wheel clamps.
- Verify pedal operation.
- Ensure the emergency stop switch functions correctly.
- Listen for unusual noises during operation.
Daily inspections help identify minor issues before they become major problems.
Weekly Inspection Checklist
Every week, perform a more detailed inspection.
Check the following: https://www.exportersindia.com/shiv-shakti-garage-equipments/
- Lubricate moving components.
- Tighten anchor bolts.
- Clean the bead breaker assembly.
- Drain moisture from the air filter regulator.
- Inspect pneumatic cylinders.
- Check the turntable for smooth rotation.
- Verify clamp alignment.
Weekly maintenance improves machine reliability after Tyre Changer Installation.
Monthly Inspection Checklist
Once every month:
- Inspect electrical wiring.
- Check motor performance.
- Examine bearings.
- Verify mounting head adjustment.
- Inspect plastic wheel protectors.
- Test machine calibration.
- Replace worn parts if required.
A preventive maintenance program protects your investment and keeps the machine operating at peak efficiency.
Safety Tips After Tyre Changer Installation
Following safe operating practices is just as important as proper installation.
Train Every Operator
Only trained technicians should operate the machine. Proper training reduces mistakes, improves safety, and protects customer vehicles.
Use the Correct Air Pressure
Always operate the tyre changer within the pressure range recommended by the manufacturer. Incorrect air pressure can reduce clamping force and affect machine performance.
Inspect Before Every Shift
A quick visual inspection before each working day helps identify:
- Air leaks
- Loose bolts
- Damaged hoses
- Electrical issues
- Worn mounting head protectors
Keep the Work Area Clean
Maintain a clean workspace around the tyre changer to reduce accidents and improve technician efficiency.
Benefits of Professional Tyre Changer Installation
Investing in professional Tyre Changer Installation offers long-term business benefits.
Increased Productivity
A correctly installed machine allows technicians to complete tyre replacement jobs quickly and efficiently.
Improved Safety
Proper installation reduces the risk of accidents caused by unstable equipment or faulty electrical connections.
Longer Equipment Life
Correct alignment, stable mounting, and accurate calibration reduce unnecessary wear on critical components.
Lower Maintenance Costs
Professional installation minimizes future repair requirements by ensuring every system operates correctly from the start.
Better Customer Satisfaction
Reliable equipment helps deliver fast, accurate, and damage-free tyre service, encouraging repeat business.
Frequently Asked Questions (FAQs)
1. Why is professional Tyre Changer Installation important?
Professional Tyre Changer Installation ensures the machine is correctly positioned, securely anchored, properly connected, and accurately calibrated for safe and efficient operation.
2. Can I install a tyre changer myself?
Some basic assembly tasks can be completed by experienced technicians. However, electrical connections, pneumatic setup, calibration, and safety checks should be performed by qualified professionals.
3. What type of floor is required?
A strong, level reinforced concrete floor is recommended to support the machine and minimize vibration during operation.
4. What air compressor should I use?
Select an air compressor that meets the machine’s specified air pressure and airflow requirements. Clean, dry compressed air is essential for reliable pneumatic performance. https://www.instagram.com/shiv_shakti7799/
5. How much space should I leave around the machine?
Allow sufficient clearance for:
- Technician movement
- Wheel handling
- Maintenance access
- Safe operation
The required space depends on the machine model and the size of the wheels being serviced.
6. Should the machine be anchored to the floor?
Yes. Proper anchoring improves stability, reduces vibration, and enhances operational safety.
7. How often should I inspect the installation?
Conduct daily visual inspections, weekly maintenance checks, monthly detailed inspections, and an annual professional service.
8. What happens if the machine is not level?
An uneven installation can cause vibration, inaccurate operation, excessive wear, and reduced equipment life.
9. How do I know if the installation is correct?
A properly completed Tyre Changer Installation should result in:
- Stable machine operation
- Smooth turntable rotation
- Strong clamping force
- Correct bead breaker operation
- Accurate mounting head alignment
- No unusual vibration or noise
10. Does installation affect machine warranty?
Many manufacturers require proper installation according to their guidelines. Following the recommended installation procedures helps maintain warranty coverage.
Why Choose Shiv Shakti Garage Equipments?
Choosing the right supplier is just as important as choosing the right machine. Shiv Shakti Garage Equipments provides complete support from equipment selection to installation and after-sales service. https://www.exportersindia.com/shiv-shakti-garage-equipments/
Our Product Range
We supply:
- Automatic Tyre Changer Machines
- Semi-Automatic Tyre Changer Machines
- Leverless Tyre Changers
- Run Flat Tyre Changers
- Truck Tyre Changers
- Wheel Balancing Machines
- 3D Wheel Alignment Machines
- Two Post Lifts
- Scissor Lifts
- Car Washing Lifts
- Air Compressors
- Car Paint Booths
- Complete Garage Equipment
Why Customers Choose Us
- Premium-quality garage machinery https://shivshaktigarage.com/tyre-business-idea/
- Competitive pricing
- Expert installation assistance
- Operator training
- Reliable after-sales support
- Genuine spare parts
- Technical guidance
- Nationwide delivery
Our commitment is to help workshops improve productivity, reduce downtime, and provide professional automotive services.

Conclusion
A successful Tyre Changer Installation is the foundation of safe, efficient, and reliable tyre service operations. Proper planning, correct machine positioning, secure anchoring, accurate electrical and pneumatic connections, and thorough testing all contribute to long-term equipment performance.
This Tyre Changer Installation guide has covered everything from workshop preparation and installation procedures to maintenance, troubleshooting, and safety recommendations. By following these best practices, workshop owners can improve technician productivity, protect customer vehicles, and maximize the return on their equipment investment.
Remember that professional installation is not just about setting up the machine—it’s about creating a safe and efficient working environment that supports business growth. Combined with regular maintenance and operator training, a correctly installed tyre changer can provide years of dependable service.
Whether you are establishing a new tyre shop or upgrading an existing workshop, following this Tyre Changer Installation guide will help ensure your equipment performs at its best from day one.
Shiv Shakti Garage Equipments
Contact Information : 7827552107,8882116582
Location : Delhi 110018
Shiv Shakti Garage Equipments offers high-quality tyre changer machines along with professional installation support, operator training, and dependable after-sales service. Contact our team today for expert guidance and complete garage equipment solutions tailored to your business.